Hi Guys now a days we are all using mostly in Microsoft Word for PDF Files Working with PDFs has become as common as working with Word docs, but to get the full editing capabilities in Adobe Acrobat you must shell out more than $400 for the Professional version. While there are plenty of less expensive alternatives, the simplest solution might be a tool you already use: Microsoft Word 2013.While previous versions of Word let you save a document as a PDF, Word 2013 allows you to open an Adobe formatted file, modify it and then resave it back to the PDF format without using Acrobat. Microsoft calls this new feature PDF Reflow, and here we’ll show how it works with a file containing text and an image.

Open Word 2013. Select File > Open, then Browse to the folder that contains your PDFs. Select a file and click the Open button. Notice the selected file appears in the View window on the right. For this example, select a file with text and graphics.
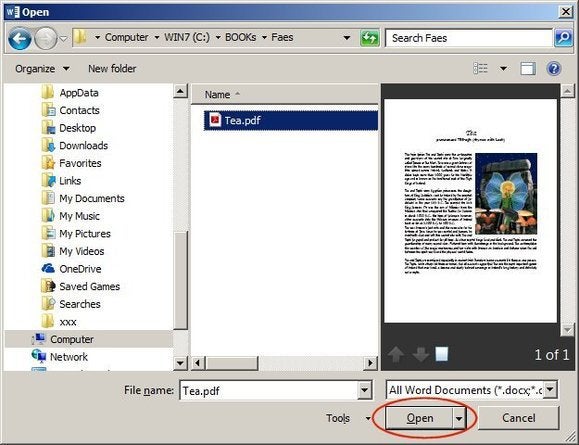
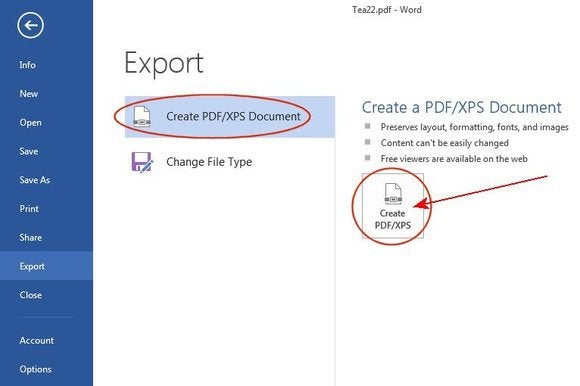
Open Word 2013. Select File > Open, then Browse to the folder that contains your PDFs. Select a file and click the Open button. Notice the selected file appears in the View window on the right. For this example, select a file with text and graphics.
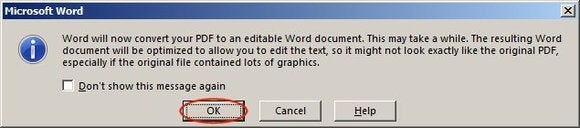
message warns that large files take longer to load, and the layout in Word may not look exactly like the original PDF. That’s because margins, columns, tables, page breaks, footnotes, endnotes, frames, track changes, and special format options such as font effects (among other things) may differ between the original software used to create the PDF file (such as InDesign, WordPerfect, Microsoft Publisher, Photoshop, etc.) and Word.Microsoft suggests that text documents transfer and reflow better than documents heavily laden with charts and graphics, tags, bookmarks, footnotes, and/or track changes. These additional text blocks often land in the middle of paragraphs or tagged on to the end. Be aware of these limitations so you can plan for the outcome and make adjustments as needed.Many of the layout attributes, however, are compatible and transfer from the PDF directly into Word with no problems. For example, the following image is a copy of the original PDF we opened in Word 2013.
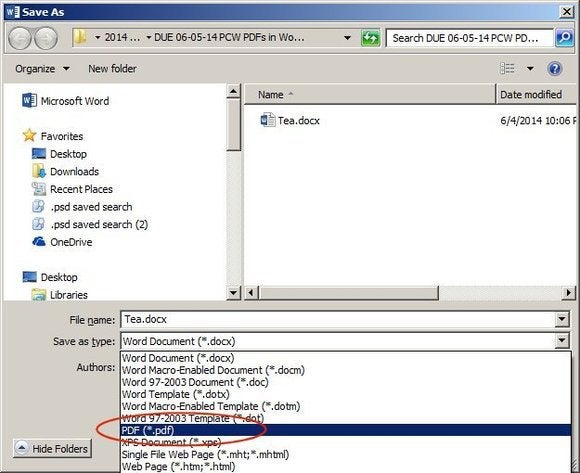
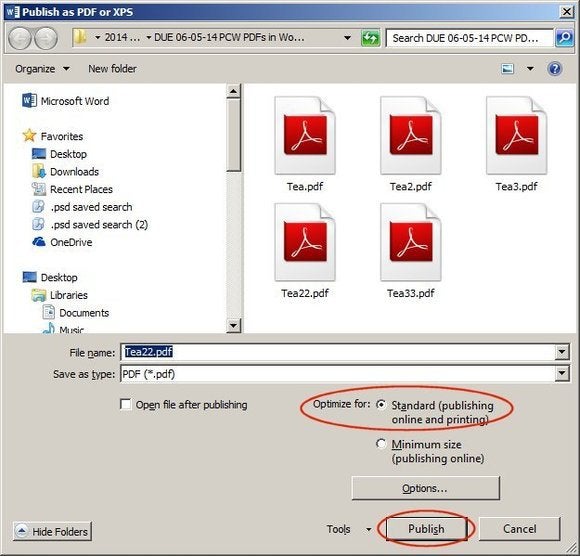
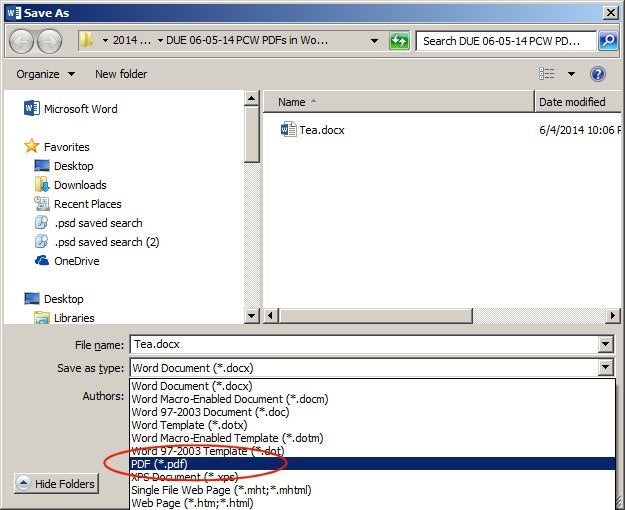
Once the document is altered to your satisfaction, choose File > SaveAs, navigate to the appropriate folder, then choose PDF from the Save as Type dropdown list.
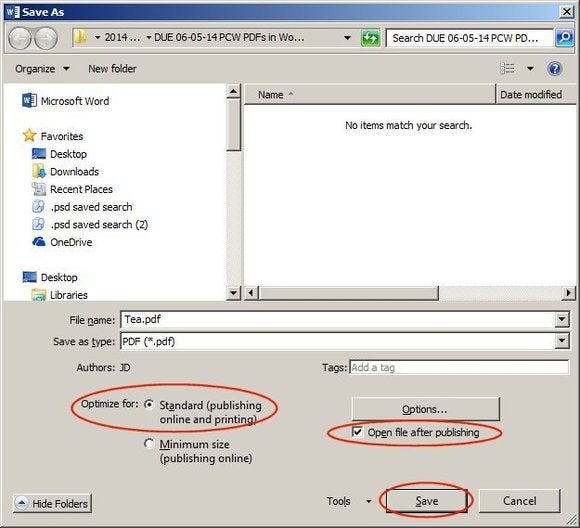
system displays the following PDF file type screen. Choose: Optimize for Standard (publishing online and printing) and check the box for Open File After Publishing, then click Save.
errors in the republished/resaved PDF documents, you may have to go back and reformat the pages. Text will likely re-flow with no problems, but the graphics using text-wrap may disrupt the text flow. If that happens, break up the paragraphs so that one text box ends before the image, then another, new text box begins again after the image. Once that’s accomplished, hard-code the position of the graphic box.
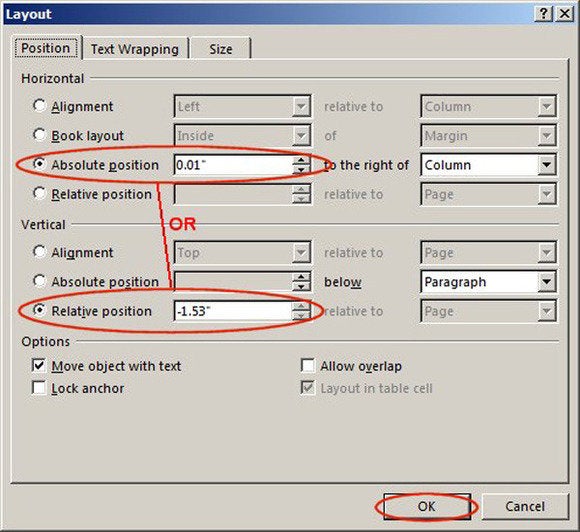
Right click the image, choose Wrap Text>More Layout Options, and the following screen appears:
Text is moved and rearranged in your new PDF, you may want to choose a Relative horizontal and vertical position. This allows the image to move with the text. If you want the image to remain absolutely at the bottom-left side of page one, then choose an Absolute horizontal and vertical position. You don’t have to locate or guess the position, just move the image and the new position coordinates appear in the above box. All you have to do is click Absolute or Relative, then click OK.
Once these decisions are settled, repeat the steps above to re-save or re-export the file to a new PDF.
ALSO READ: C:LICK HERE


EmoticonEmoticon